- 4GB USB Drive (minimum)
- Windows 7 ISO (32-bit or 64-bit)
- Windows Vista
- MBRwiz (Windows XP diskpart utility does not detect USB pen drives so this free utility will make the USB drive bootable)
- MagicDisc (freeware utility to mount ISO as virtual drive)
Note:
My running OS during this setup (which worked) was Vista (32-bit for the 32-bit Win7). When I tried using XP, the process resulted in a bad boot sector so I could not use the USB Flash drive to load Windows 7. I've seen other blogs where the likely suspect is the 'bootsec.exe' command does not work properly when on XP (I've no idea why). Also, in Vista, you actually don't need the separate 'MBRwiz' program, as 'diskpart' will work just fine. The steps to use that process can be easily googled, or you can leave me a comment and I'll add those in this blog.
Steps
1. Connect your USB flash drive to your computer for formatting, and make note of the drive letter assigned. For the purposes of this tutotial we will use E:.
2. In Windows Explorer or other file management utility, right click on the USB drive and select 'Format…' from the context menu.
2. In Windows Explorer or other file management utility, right click on the USB drive and select 'Format…' from the context menu.

3. Click the 'Start' button to begin formatting your USB drive. This ensure there is nothing on the drive (starting from scratch if you will).

4. Open a command prompt window ('Start' menu -> 'Run…' -> cmd -> press 'ENTER') and type:
convert E: /fs:ntfs (remember E: is my drive letter so substitute with yours as appropriate).
5. Extract your download of MBRwiz (if not already done) to a location of your choice, and open a command window in the same location. Run the commands:
MBRWiz.exe /list (this gets a listing of all disks, so note down the disk number assigned to your USB drive which will be used in the next command)
MBRWiz.exe /list (this gets a listing of all disks, so note down the disk number assigned to your USB drive which will be used in the next command)

MBRWiz.exe /disk=2 /active=1 (my disk was detected as '2', so replace this with whatever yours was detected as)

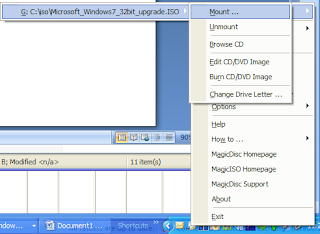
6. Install the MagicDisc software (if not already done) and mount your Windows 7 ISO as a virtual drive (mine was mounted as G:). You can of course use any other type of such software such as CD Anywhere, it does not matter. Alternatively, if you have a Windows 7 disk, or the full installation files otherwise you can use this, you do not need the ISO (I just happened to download it as such).
7. Open a command prompt window to the virtual drive, navigate below the 'boot' subdirectory and run the command:
bootsect /nt60 E: (E: was my drive letter substitute with yours as appropriate).
7. Open a command prompt window to the virtual drive, navigate below the 'boot' subdirectory and run the command:

Note: This command will only work if the architectures match, i.e. I was using 32-bit Windows XP, and had a 32-bit Windows 7 media (and hence 'bootsect' file). When I tried using the same 'bootsect' command from the Windows 7 64-bit media it failed. I've not tested it yet, but it is likely that you can just run the 32-bit version of the 'bootsect /nt60 E:' command, and then continue with the steps for copying the 64-bit Winows 7 media to the USB drive and it should still allow installation from the USB (after all this command is only saying make the USB bootable to Windows 7, right?).
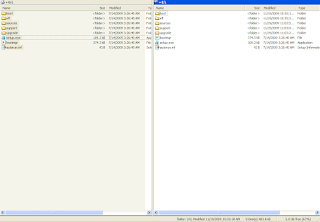
8. Copy all the files from your Windows 7 media (in my case ISO mounted virtual drive G:) to your USB drive. You should be able to use any file manager such as Windows Explorer (in my case I used Xplorer2 Lite which has dual pane views).
9. Before using your new USB drive with Windows 7 to boot and install Windows 7, ensure your BIOS is setup to boot from a USB drive. This is configured when rebooting by entering your BIOS, or just pressing F9 for a boot option screen in some cases. If all goes well Windows 7 installation should start from your USB drive.
8. Copy all the files from your Windows 7 media (in my case ISO mounted virtual drive G:) to your USB drive. You should be able to use any file manager such as Windows Explorer (in my case I used Xplorer2 Lite which has dual pane views).

9. Before using your new USB drive with Windows 7 to boot and install Windows 7, ensure your BIOS is setup to boot from a USB drive. This is configured when rebooting by entering your BIOS, or just pressing F9 for a boot option screen in some cases. If all goes well Windows 7 installation should start from your USB drive.